( click on each image for an
enlarged view -- then click on
your back button to return
to the instruction page ).
Contributed by: SGT Rock, 4/2/02

|
( click on each image for an enlarged view -- then click on your back button to return to the instruction page ).
|
|
Parts: o 3 soda drink cans o Metal tape, a 3/8"x8" strip (optional). o Large hardware cloth 4 squares x 19 squares. o Fiberglass insulation 1/16" wide, 3/4" high, 8" long. Tools: o Needle nose pliers o Knife o Scissors o Ruler 1. Start by making 8 slits evenly spaced around the stove that are 1/4" long with the tip of a knife blade. 2. Once you have cut the hole, cut the bottom out of the can using the knife. To do this you start by scribing a line on the inside of the bottom. Scribe it pretty deep but not all the way thru. Next scribe an X across the bottom the same way. Finally poke out the center of the X and bend the quarters until they break out on your scribe line. 3. Cut the bottom off the can 1 1/8" from the bottom using the knife. After that, use the scissors to trim it down to 1" from the bottom and even around. 4. Cut three slits about 1/2" deep evenly spaced from the bottom.
1. Take the remainder of the can and cut a flat piece 1 1/8" tall by 7 1/2"" long. 2. Cut two 1/2" deep slits 1/8" from the ends, one from the top and one from the bottom. 3. Cut 4 notches 1/8" deep around the bottom edge. 4. Wrap into a cylinder and secure using tabs from #2. <insert picture here> 1. Cut the bottom of the second can 1 1/8" from the bottom using the knife. Then using the scissors, trim it to 1" tall. 2. Cut the fiberglass strip to 1/6" thick, 3/4" tall, and 8" long. Wrap around your cylinder from Step 3 and push these pieces into the fuel chamber you just cut in #1. 3. Push the burner from Step 2 down over the fuel chamber and ensure you align the inner wall until it fits down inside the lip of the burner. The wall of the burner should go over the wall of the fuel chamber. Also make sure you haven't blocked the burner holes on the inside.. 4. Use the metal Tape to secure the two halves (optional). 1. Cut the top wire off the 4 square x 19 square piece of hardware cloth using needle nose pliers. 2. Bend into a cylinder. 3. Bend tines on the side where the ends meet around each other to hold them in place. 4. Insert into stove into the center of the stand.
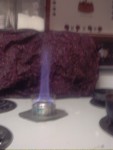
1. Cut the bottom off a third can. Trim the side off to where the paint for the label starts. 2. Cut the bottom in to equal or close to equal sized halves. Finished project should look like this: Now try boiling a pint of water using 3/4 ounces of alcohol (3 soda caps full). You should also build a windscreen using these instructions.
|
Return to: [ Top of This Page ] [ Make Your Own Gear Page ]