
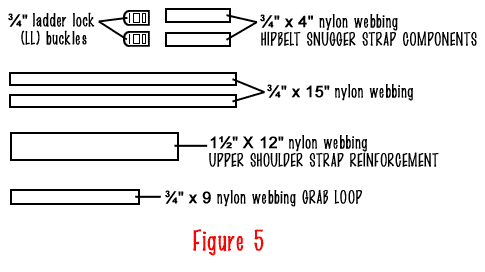
| 1. |
The layout of all the parts for the back/bottom panel is shown in photo 1. The parts for the bottom shoulder strap reinforcement and webbing hipbelt are also included. | |
 |
||
| 2. |
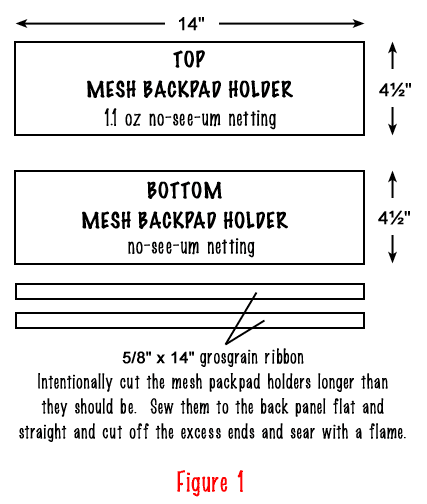
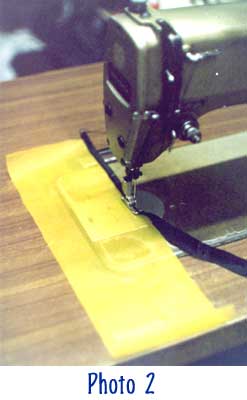
Cut the no-see-um mesh backpad holders (2 pcs.) and 5/8" wide grosgrain (gg) ribbon according to figure 1. We're going to use the gg as an edging for the former. I find it helpful if you crease first the middle line running along the ribbon before you sew it to the edge of the mesh. This way, it will come out neat and straight. Refer to photo 2. | |
|
||
 |
||
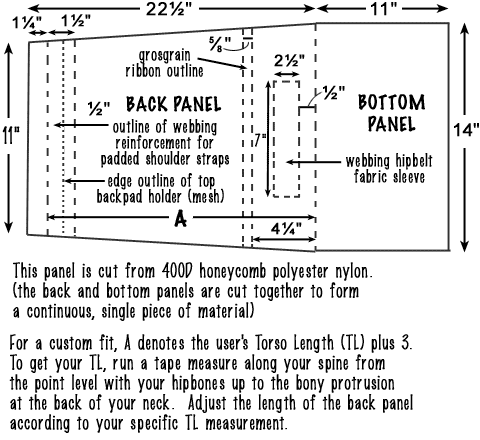
| 3. |
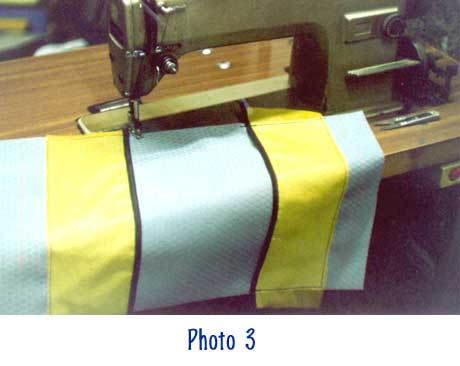
Sew mesh backpad holders onto back
panel as shown in photo 3. Their respective placements are given in figure
2. It is best to draw them out with tailor's chalk. After sewing, cut off
excess mesh panel ends and sear to prevent raveling. Cut off a 14" length
of 5/8" wide gg and sew to the bottom edge of the bottom mesh backpad holder
to neatly cover the exposed mesh end.
|
|
 |
||
 |
||
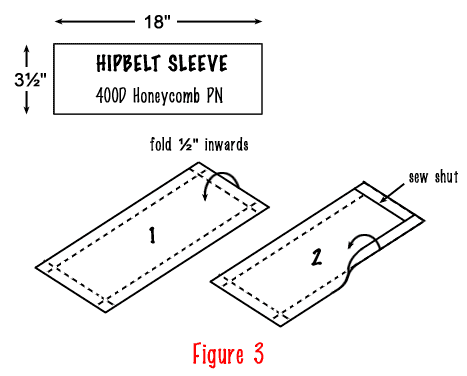
| 4. |
Cut the webbing hipbelt sleeve from 420d nylon packcloth as shown in figure 3. Fold edges 3/8" inwards around and sew in place. Sew sleeve on its designated place on the lower part of the back panel. Make sure it is centered and that it is sewn at the top and bottom edges only. Make several stitch passes per sleeve edge. Leave the sides unsewn (i.e. open) for the webbing hipbelt to pass through. The dimensions of this sleeve is cut so as to accommodate a range of webbing widths from a minimalist 3/4" wide to a very comfy 2" wide hipbelt. | |
 |
||
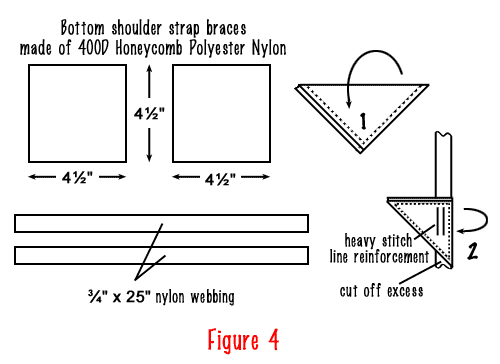
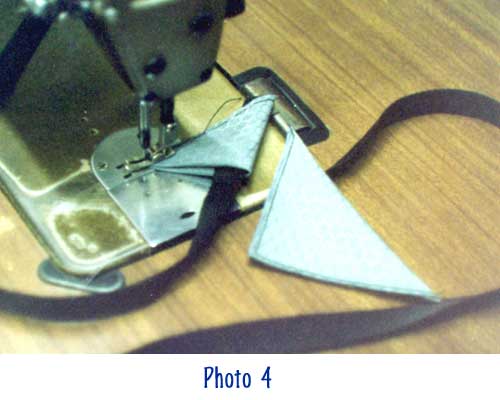
| 5. |
Cut the reinforcement for the bottom shoulder straps from 400d honeycomb polyester nylon (since the shoulder strap top and bottom parts alike receive a lot of stress during use, I recommend at least a moderate-weight fabric, 330d or more, for use in these areas) as shown in figure 4 (2 pcs.). Fold crosswise and sew short, square edges in place. Refer to the bigger, triangular assembly at photo 4. Next, cut 2 pcs. of 3/4" x 25" nylon webbing and sear ends (figure 5). Sew webbing into triangular reinforcement assembly by folding the latter into two and inserting the former into the open slit. Then sew around edges and reinforce the sandwiched webbing by making several passes over it. Cut of the very, very short, excess end of the webbing and sear (refer to the same photo). | |
|
||
|
||
 |
||
| 6. |
Sew reinforced, bottom shoulder strap assembly onto its proper location at the bottom side portions of the back panel with the bottom tip (apex) of the assembly level with the bottom edge of the hipbelt sleeve. | |
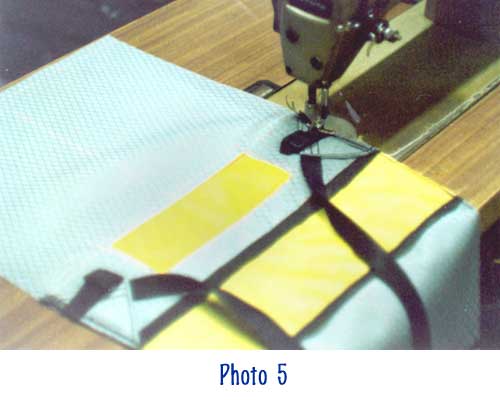
| 7. |
Construct snugger strap assembly
by threading 3/4" x 4" nylon webbing through 3/4" ladderlock (LL) buckle.
Make 2 sets for both sides of the hipbelt. Then sew each over the triangular
bottom shoulder strap assembly by positioning it level with the middle
portion of the hipbelt sleeve.
Refer to photo 5.
|
|
 |
||
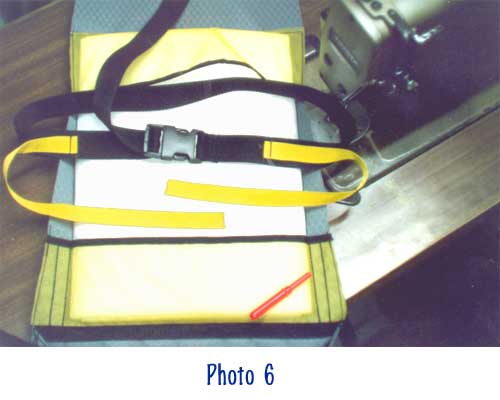
| 8. |
To keep the backpad really
in place (even though the pack isn't full), especially at the bottom portion,
sew vertical stitch lines about 1" from the ends of the bottom mesh backpad
holder. Refer to photo 6 (shown by red pointer).
|
|
 |
||

Bottom assembly